
It’s one of your more pleasant tasks as a QuickBooks user: receiving payments from customers. Here’s how it works.
QuickBooks was designed to make your daily accounting tasks easier, faster, and more accurate. If you’ve been using the software for a while, you’ve probably found that to be true. Some chores, of course, aren’t so enjoyable. Like paying bills. Reconciling your bank account. Or anything else that has the potential to reduce the balance in your checking accounts.
The process of receiving customer payments is one of your more enjoyable responsibilities. You supplied a product or service that someone liked and purchased, and you’re getting the money due you.
Depending on the situation, you’ll use one of multiple methods to record customer payments. Here’s a look at some of your options.
A Familiar Screen
If you’re like many businesses, you send invoices to customers to let them know what they owe and when their payment is due. So one of the most commonly used ways to record payments is by using the Receive Payments window. To open it, click the Receive Payments icon on the home page or click Customers | Receive Payments.
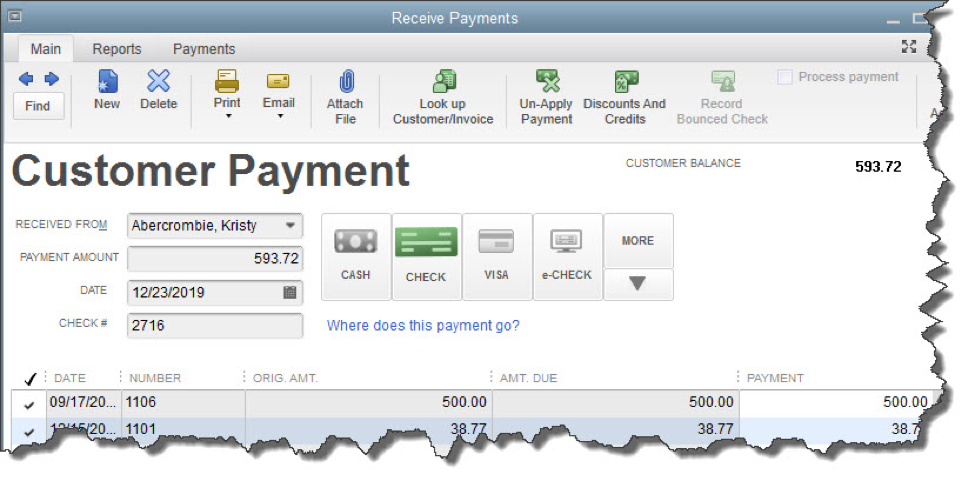
You’ll use QuickBooks’ Receive Payments screen when you record a payment made in response to an invoice.
The first thing you’ll do, of course, is choose the correct customer by clicking the down arrow in the field to the right of RECEIVED FROM. The outstanding balance from that customer will appear in the upper right corner, and invoice information will be displayed in the table below. Enter the PAYMENT AMOUNT and make sure the DATE is correct. (The next field, REFERENCE #, changes to CHECK # only if the CHECK option is selected.)
Next, you’ll need to ensure that the payment is applied to the right invoices. If it covers the whole amount due, there will be a checkmark in every row in the first column of the table. If not, QuickBooks will use the money received to pay off the oldest invoices first. To change this, click Un-Apply Payment in the icon bar and click in front of the correct rows to create checkmarks.
Several Options
You’ll then want to tell QuickBooks what payment method the customer is using. Four options are displayed. The possibilities that are visible here are:
- CASH
- CHECK
- CREDIT DEBIT (A specific card type may be shown here if you’ve indicated the customer’s preferred payment method in his or her record.)
- e-CHECK
If the desired payment method isn’t included in those four, click the down arrow under MORE. If it’s still not there, click Add New Payment Method. This window will open:
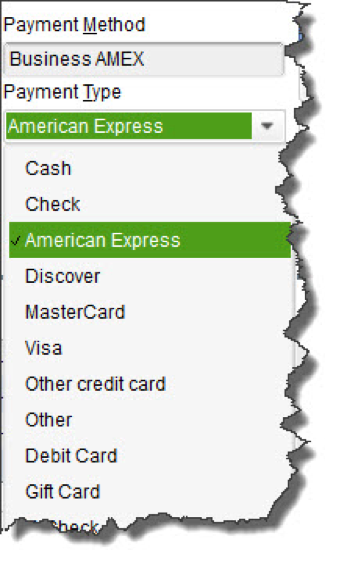
The New Payment Method window
Click OK. When you choose your new payment method from the list, a window opens containing fields for the card number and expiration date. Click Done after you’ve entered it, and you’ll be returned to the Receive Payments screen. If you’re satisfied with your work there, click Save & Close or Save & New.
Haven’t gotten set up to accept credit and debit cards yet? We can get you going with a merchant account to make this possible. You’re likely to find that some customers pay faster with this option. Your customers will be able to click a link in an emailed invoice and make their payments.
Instant Sales
Depending on the type of business you have and its physical location, there may be times when customers will come in and buy something on the spot. You’ll need to give them a Sales Receipt. Click Create Sales Receipts on the home page or open the Customers menu and select Enter Sales Receipts to open this window:
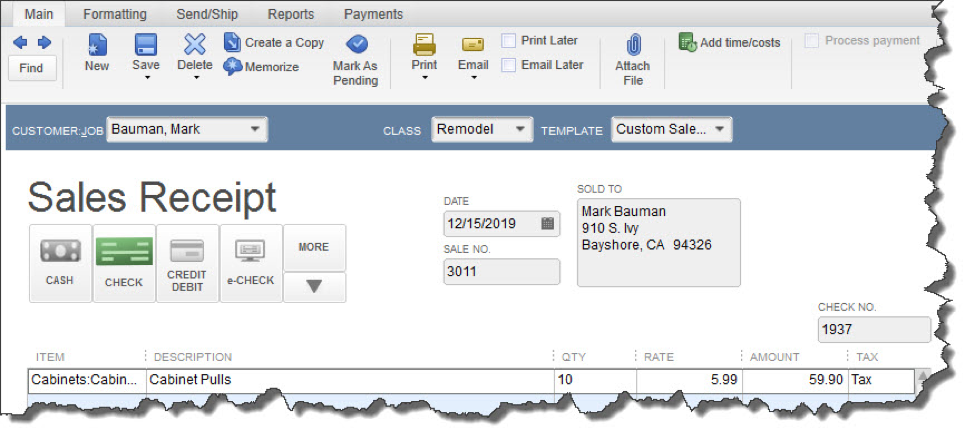
The Enter Sales Receipts window
You’ll complete this form much like you entered data in the fields of the Receive Payments window. As you can see, you can print the mail for the customer and/or email it.
After all the hard work you’ve done to make your sales, the last thing you want to do is record a payment incorrectly so it isn’t processed and you don’t get paid. Though QuickBooks makes the mechanics of receiving payments simple enough, you still should understand the entire process involved in getting income into the correct accounts. We’re available to help with this and any other areas of QuickBooks. If you would like to learn more about QuickBooks Payments click here.